Sign in and recover access
Follow each sign-in method, understand when verification codes are required, and recover access to your Azimea account.
login · sign in · authentication · forgot password · lost phone · recovery code · Google login · Microsoft login · Firefox passkey
Start at your usual Azimea dashboard address. Use the same address when creating and using a passkey. If your company gave you a company sign-in link, use that link for company SSO.
To add or change methods after signing in, follow Account security and passkeys.
Screenshots use a fictional Lumen Atelier Studio demo account. Codes and setup keys shown in the guides are illustrative and do not provide account access. Select a screenshot to open it at full size in a new tab.
First access to Azimea
Section titled “First access to Azimea”If you do not have an account, select Create one on the sign-in page. Enter your name, company name, email and a password that meets the displayed requirements, review the terms/privacy information, and submit the form. Registration opens your workspace; follow the email-confirmation link sent to your mailbox to confirm the address. If you were invited to a company, use its invitation link to join the intended workspace instead.
Email confirmation reminders
Section titled “Email confirmation reminders”If your address remains unconfirmed, Azimea can send up to two automatic reminders, normally 24 and 72 hours after registration. Each message contains a fresh confirmation link that is valid for 24 hours. Follow the most recent link; requesting a new link replaces the previous one. Check your spam folder if the message does not arrive, or request another link from the dashboard.
Confirming your address stops these reminders. A manually requested link postpones the next automatic reminder by at least 24 hours. Existing unconfirmed accounts are included when reminders are enabled, with at least 48 hours between the two automatic messages. These are account verification messages, separate from marketing and setup notifications.
Once your email is confirmed, open Settings → Security and add your preferred methods. If Protect your account offers a passkey or authenticator setup after sign-in, you can start there too. This optional invitation is separate from company requirements; postponing it does not waive a mandatory company rule. Save recovery codes after turning on code-based verification, then test your methods using the end-to-end checklist.
Browser security checks
Section titled “Browser security checks”When browser security checks are enabled, creating an account with a password and requesting a password-reset link require a Cloudflare Turnstile check. Password sign-in can also request a check after repeated failed attempts from the same internet connection. Most checks complete automatically; follow the checkbox prompt if one appears. This check is separate from your password, passkey and two-step verification.
Wait for Security check complete, then submit the form. If the check expires or cannot finish, select Retry security check. Your entered details remain in the form. Check your connection and whether a browser extension is blocking the security widget. If the service is temporarily unavailable, wait and retry; an unverified password-reset request does not send an email. Existing passkey and provider alternatives remain available from Use another method on the sign-in page.
Choose a sign-in method
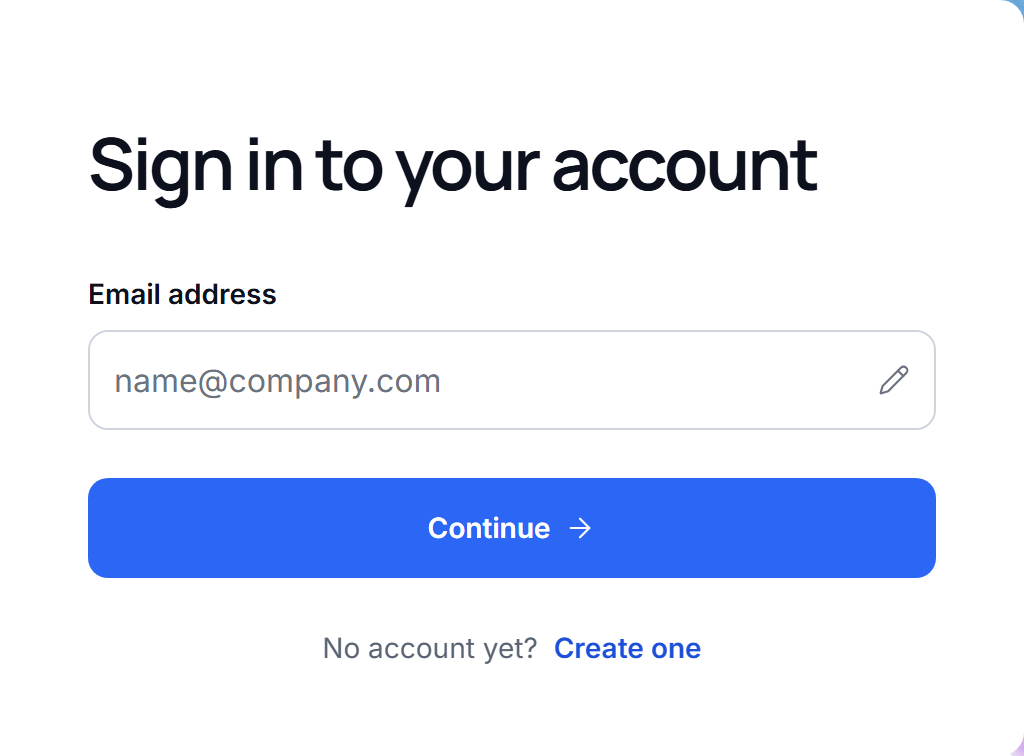
Section titled “Choose a sign-in method”- Enter your Azimea account email address and select Continue.
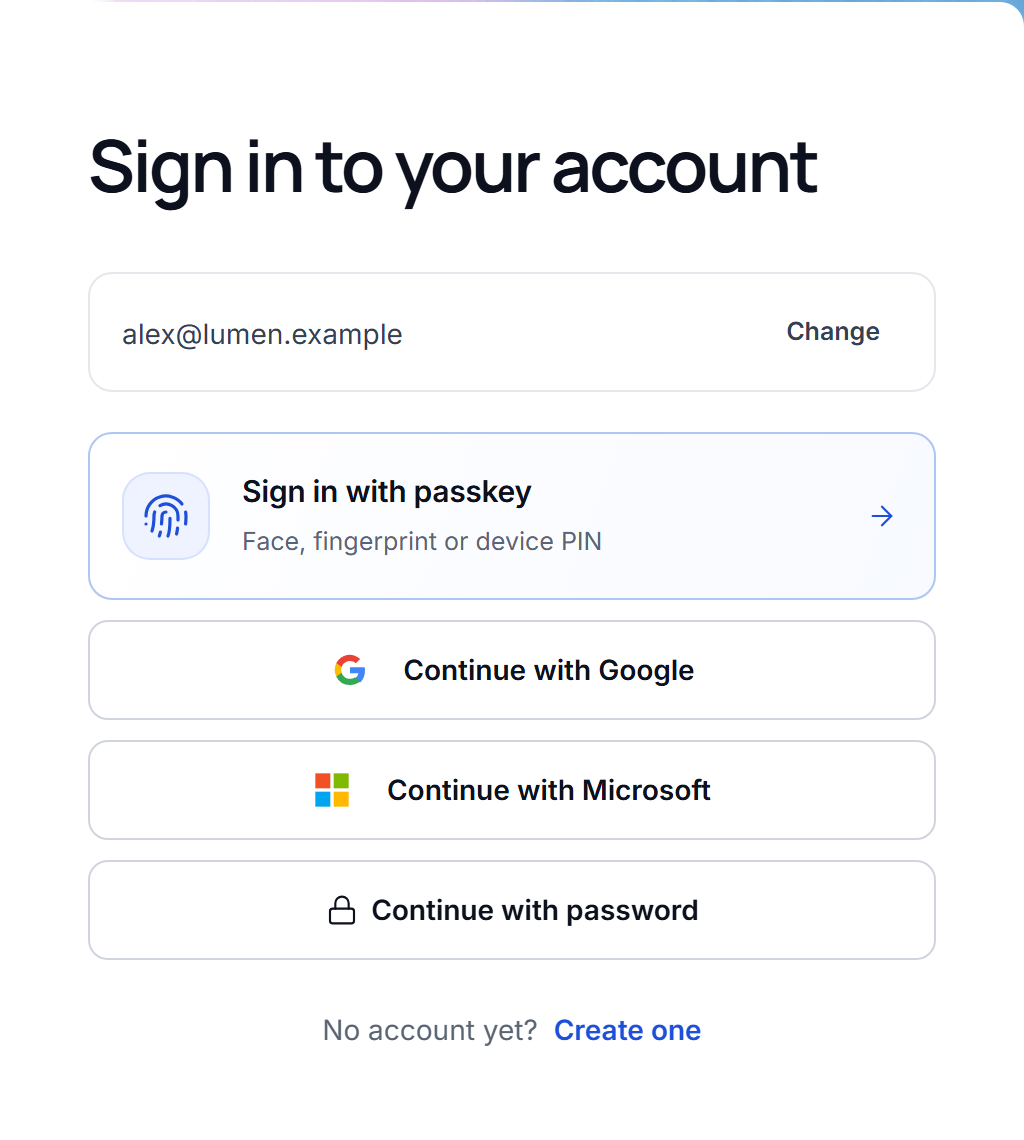
- Choose a method you have already set up. On a previously used browser, Azimea may open your last successful method directly. Select Use another method to see the alternatives.
- Complete the steps for your chosen method below.
- If your company requires additional verification, complete it before opening company data.
The email step identifies the account you intend to use; entering an address does not authenticate you. The choices on a new browser do not reveal which methods an account has configured. A visible method is not confirmation that you have already registered it. Change lets you correct the email without starting a new account.
| Method | What you need | What happens next |
|---|---|---|
| Password | Your Azimea password | An app or email code if you enabled two-step verification; otherwise sign-in completes. |
| Passkey | A registered passkey available to this browser or device | Confirm with your device or passkey provider. In the current flow, no additional app or email code is requested. |
| Google or Microsoft | An identity connected to your Azimea account | Complete provider sign-in, then your Azimea verification code if two-step verification is enabled. |
| Company SSO | Your company’s sign-in link and linked company identity | Complete company sign-in and any required Azimea verification. See Company SSO. |
| Recovery code | Your primary method and one unused recovery code | Use the recovery code in place of an unavailable app or email code at the second step. |
Email verification codes and recovery codes are second-step methods. They do not replace your password, connected provider or passkey as a standalone sign-in method.
Sign in with a password
Section titled “Sign in with a password”- Enter your email and select Continue.
- Select Continue with password, or enter your password if this browser opens that method directly.
- Select Sign in.
- If two-step verification is active, follow Complete two-step verification.
Your Azimea password can be different from your Google or Microsoft password. Accounts created with a provider do not necessarily have an Azimea password. Use the connected provider, then add a password in Security if needed.
If you have both a password and a passkey, they are alternative primary methods. Registering a passkey does not automatically turn on code-based two-step verification for password sign-in.
Sign in with a passkey
Section titled “Sign in with a passkey”Before you start, register a passkey. A new browser does not automatically have access to every passkey listed in your account.
- Enter your Azimea email and select Continue.
- Select Sign in with passkey, marked with a fingerprint icon. If another method is shown, select Use another method first.
- In the browser or operating-system dialog, choose the device or password manager that holds the passkey.
- Complete the requested fingerprint, face, device PIN, password-manager PIN or security-key verification.
- Return to Azimea. Successful verification opens your account or the company’s additional access checks.
Confirm on your device… means Azimea is waiting for that external dialog. Do not enter a device or password-manager PIN into an Azimea web form. Cancelling the prompt keeps you on the sign-in screen; retry or choose another method.
Why was no two-step code requested?
Section titled “Why was no two-step code requested?”In the current Azimea flow, a passkey with local user verification completes sign-in even when app or email two-step verification is enabled. The passkey proves access to the credential and requires verification on its device or through its provider. Password and connected-provider sign-in still require your configured code.
Having all three configured therefore currently gives you two routes: passkey with device verification, or password plus your configured code. A company may impose its own authentication requirements.
Why does it work in Chrome but not Firefox?
Section titled “Why does it work in Chrome but not Firefox?”Check where the passkey was saved. A passkey in Google Password Manager may be available through your signed-in Chrome profile without being available in Firefox. Signing into a Google website in Firefox does not itself connect Google Password Manager to that browser. A Google Password Manager PIN and a Windows Hello PIN unlock different stores; entering a PIN during setup does not identify which store you selected.
Use a compatible browser/provider combination, or sign in another way and add a separate Windows Hello passkey. Keep the working passkey until you have tested the replacement. Availability depends on your browser, operating system and password-manager integration; Azimea cannot make a credential appear in a different provider.
Sign in with Google or Microsoft
Section titled “Sign in with Google or Microsoft”Provider buttons appear only when that provider is available for Azimea.
- Enter your Azimea email, select Continue, and choose Google or Microsoft. Use Use another method if this browser initially suggests something else.
- On the provider’s page, select the identity you previously connected to this Azimea account.
- Complete any verification requested by the provider and return to Azimea.
- If Azimea asks for an app or email code, complete that second step too. Provider verification does not automatically replace your configured Azimea code.
If Azimea asks you to sign in with an existing method before connecting the provider, complete that account confirmation. A matching email alone does not silently connect a provider to an existing Azimea account. For a new connection, start from Security settings. An already connected provider may use an email alias; select the identity connected to the intended Azimea account.
If a provider reports cancellation or you chose the wrong account, return to the method choices and retry. Company SSO is separate from these personal Google/Microsoft buttons.
Complete two-step verification
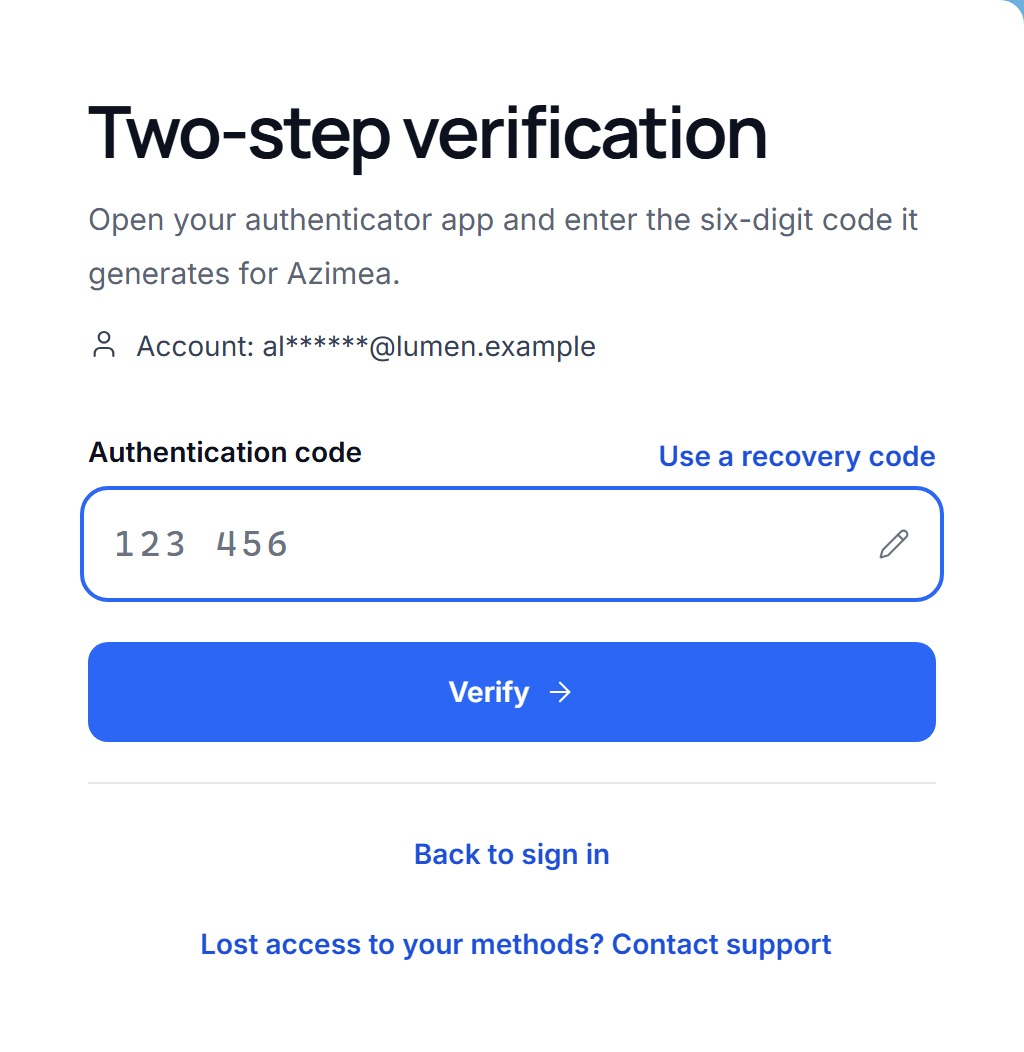
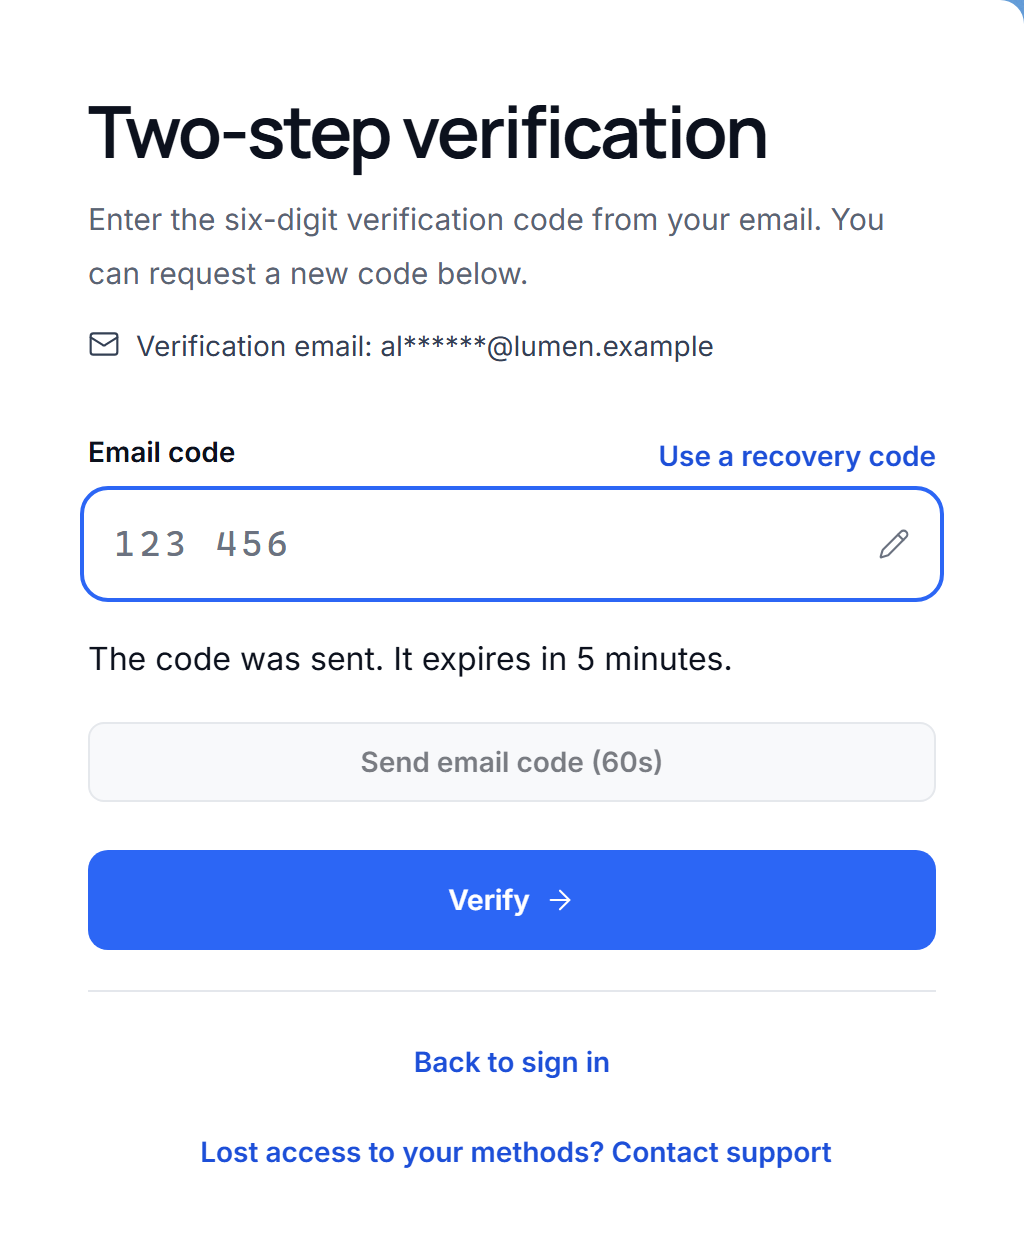
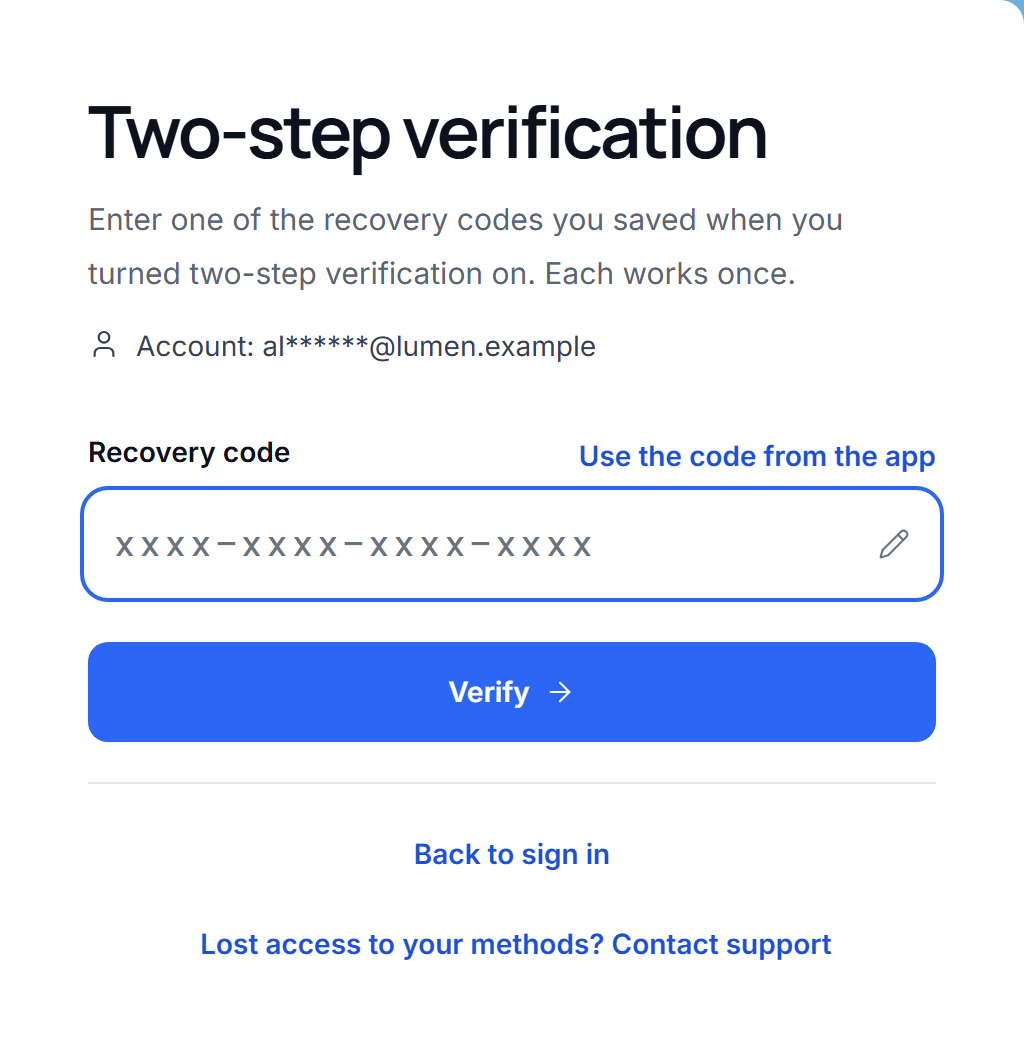
Section titled “Complete two-step verification”Below the instructions, Account: and a partially masked address identify the account for authenticator and recovery codes. Those codes come from your authenticator or saved recovery set. For email codes, Verification email: identifies the masked destination instead. A sent confirmation appears only after the send request succeeds. Select Back to sign in if you need to change the account.
Authenticator app
Section titled “Authenticator app”- Open the authenticator where you added Azimea.
- Read the current six-digit code for the correct Azimea account.
- Enter it in Azimea and select Verify.
If the code is rejected, use a fresh code and check that your device’s date and time are correct. If you no longer have the app, use an unused recovery code. Email is not automatically offered as a fallback for an account configured to use an authenticator.
Email verification
Section titled “Email verification”- When the email second step opens, Azimea requests a code for your verified account email.
- Open that mailbox and find the sign-in code. Check spam or junk if needed.
- Enter the code in Azimea and select Verify.
- If it expires or does not arrive, wait for the displayed resend cooldown, request a new code, and use the latest one.
The email used for second-step verification belongs to your Azimea account. It is not an address you choose on the sign-in screen. Never share the code with someone offering to sign in for you.
Verification-code messages put the code first in the localized subject, for example
001234 is your verification code in English. Keep any leading zeroes when entering it.
Your email app may also highlight the code or offer a copy action; that depends on the app and is not guaranteed.
Recovery code
Section titled “Recovery code”- Complete your primary sign-in method until Azimea asks for your second-step code.
- Select Use a recovery code.
- Enter one unused code from the set you saved when enabling or changing two-step verification.
- Complete sign-in. That code cannot be used again.
- In Security, repair your unavailable verification method and save a new recovery set if needed.
If you replace a recovery set, all codes from the old set stop working. An email password-reset link does not disable two-step verification or replace its recovery codes.
Forgot your password
Section titled “Forgot your password”- Enter your email, open the password method and select Forgot your password?
- Submit your Azimea email address. The confirmation is deliberately neutral; it does not reveal whether someone else’s address has an account.
- Open the password-reset message in your mailbox and follow its link.
- Enter a new password that meets the displayed requirements and submit it.
- Return to sign-in and use the new password. Complete your existing two-step verification if active.
Resetting a password does not sign you in automatically and does not turn off an authenticator or email second step. If the link has expired, was already used or was replaced by a newer request, request a new link. If password sign-in was disabled, a successful reset restores it; it does not remove the account’s other methods.
Lost a device or cannot complete sign-in
Section titled “Lost a device or cannot complete sign-in”| Situation | Next step |
|---|---|
| Passkey is on another device or provider | Use that device/provider if offered, or select Use another method. |
| Windows asks for USB or a security key | The prompt is requesting a hardware key. Select an alternative if offered, or retry with the provider where your passkey was saved. |
| Windows Hello or a PIN choice is missing | Check that the passkey is saved in Windows Hello rather than only in a browser password manager. See Passkey storage. |
| Authenticator phone is lost | Use a saved recovery code or an available passkey under the current sign-in flow. Then replace the unavailable method in Security. |
| Email code is missing | Check the correct mailbox and spam, wait for the resend option, then use the latest code. A recovery code can replace the email code. |
| Browser says the passkey was cancelled or unavailable | Retry on the correct device/provider or use another method. The message alone does not distinguish cancellation from an unavailable credential. |
| Too many attempts | Wait for the displayed retry time. Switching between password and passkey does not reset the limit. |
| Company requires more verification | Follow Configure security or Verify to continue. See Company requirements. |
| No usable primary method or second-step recovery remains | Contact Azimea support. Do not send passwords, PINs, recovery codes or authenticator setup keys. |
After regaining access, add and test a replacement method, remove the unavailable passkey if appropriate, and review Active sessions. An unexpected error may include a correlation code; give support that code, the time and the browser used. A support request does not itself grant or guarantee account access.